Custom from Theme
Go to your Theme=> Click on Edit With Elementor

- Click on the Selected Icon

- Click on Exit to Dashboard

Add Header and Footer
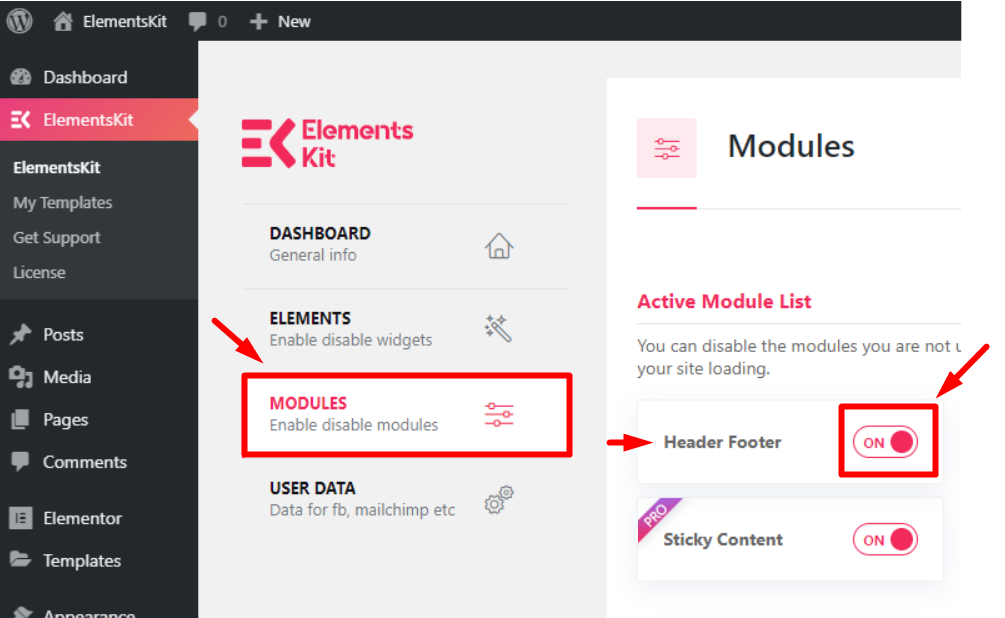
1. Make sure you’ve Header Footer module enable from ElementsKit → Modules
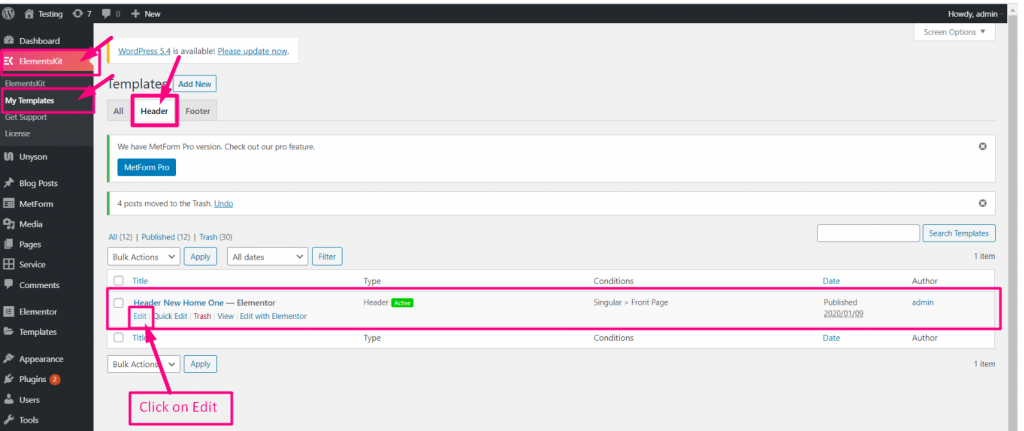
- Click on Edit
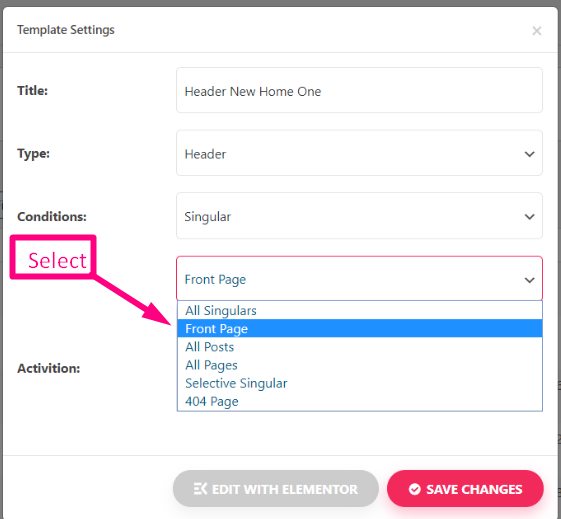
- Set your Template
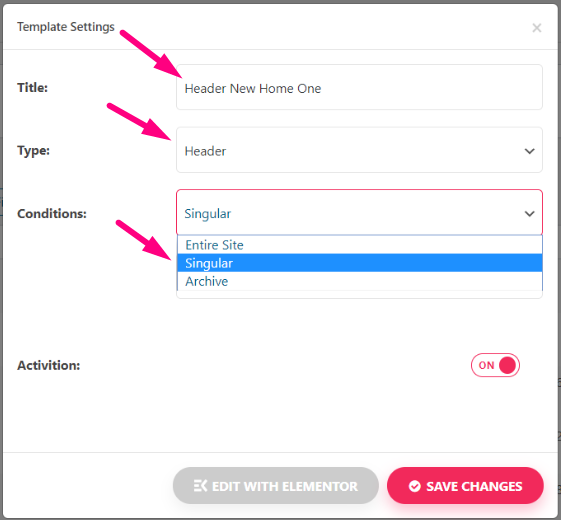
- Select Condition=> Save Changes
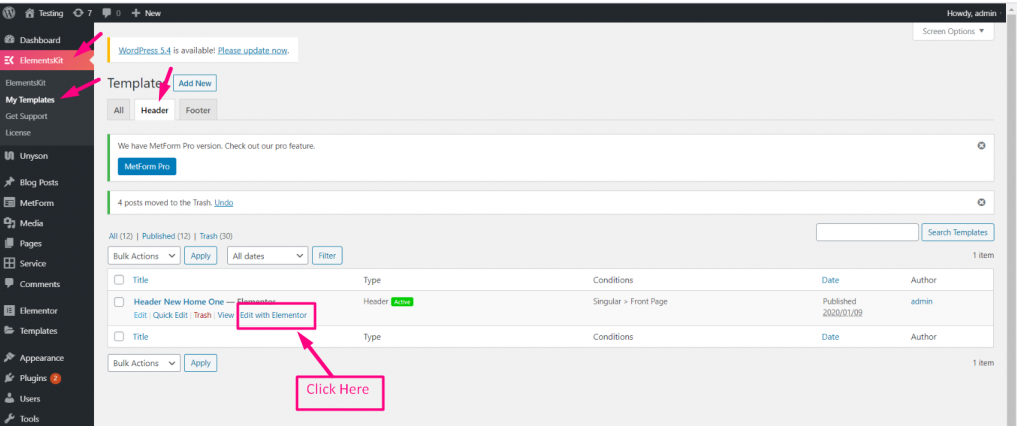
Now Go to Header=> Click on Edit with Elementor
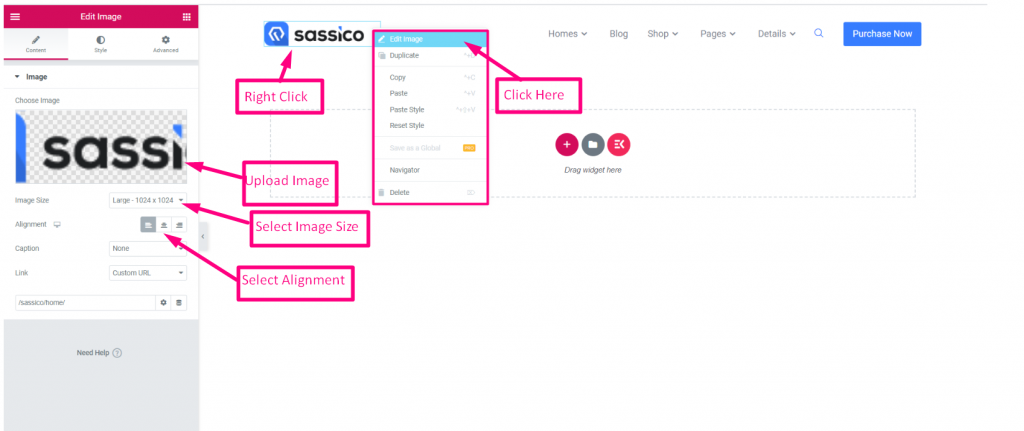
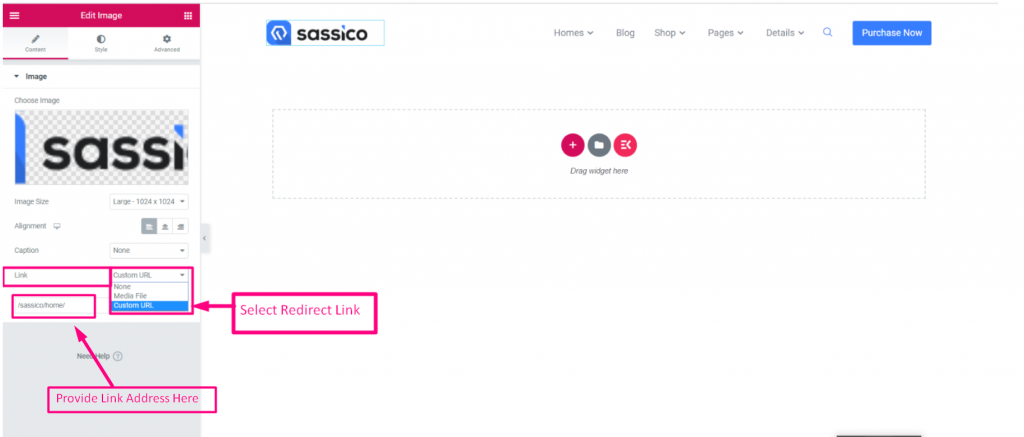
Logo Image
Now Click on the Logo Image=> Right Click on it=> Edit Image
- Upload Image
- Select Image Size
- Select Alignment
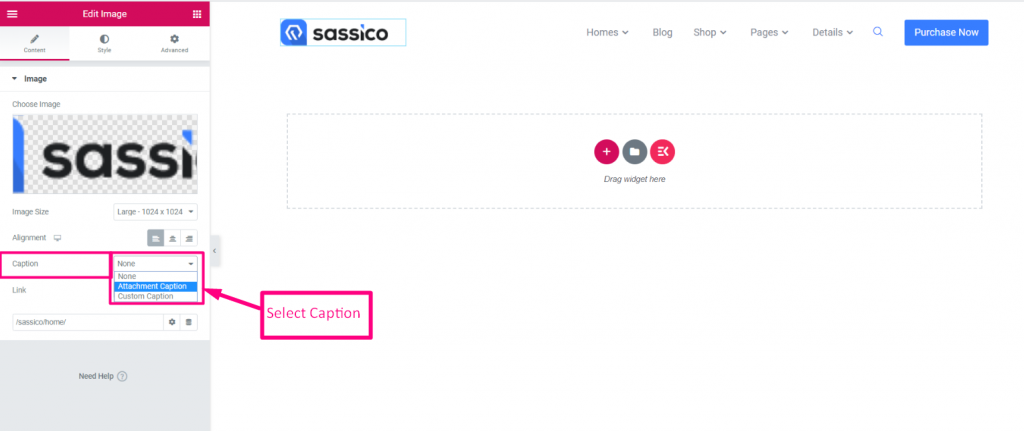
Select Caption: None, Attachment Caption or Custom Caption
- Select Link Type: None, Media File or Custom Link
- Provide the Redirect Link Address
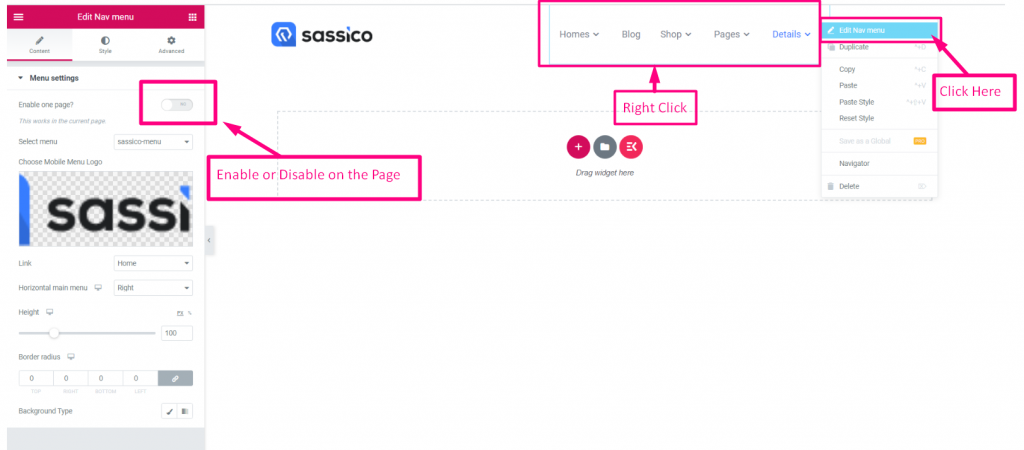
Nav Menu
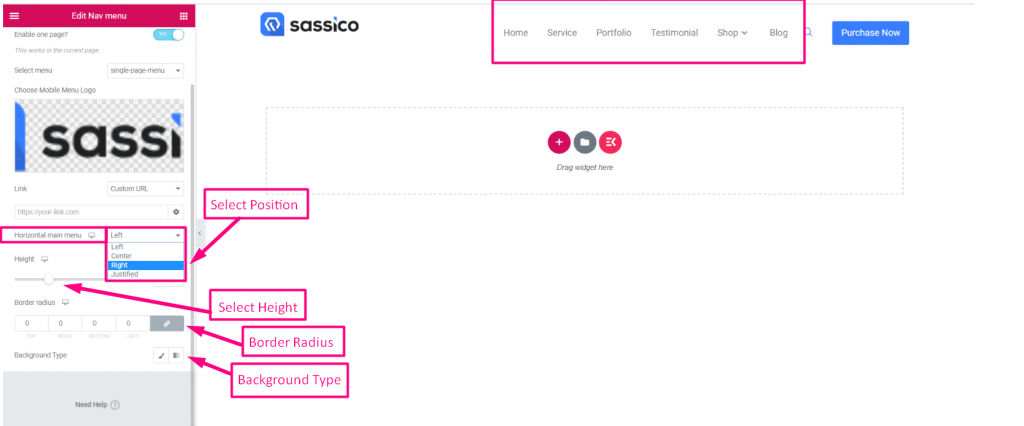
Right Click on the Nav Menu=> Edit Nav Menu=> Enable the Toggle
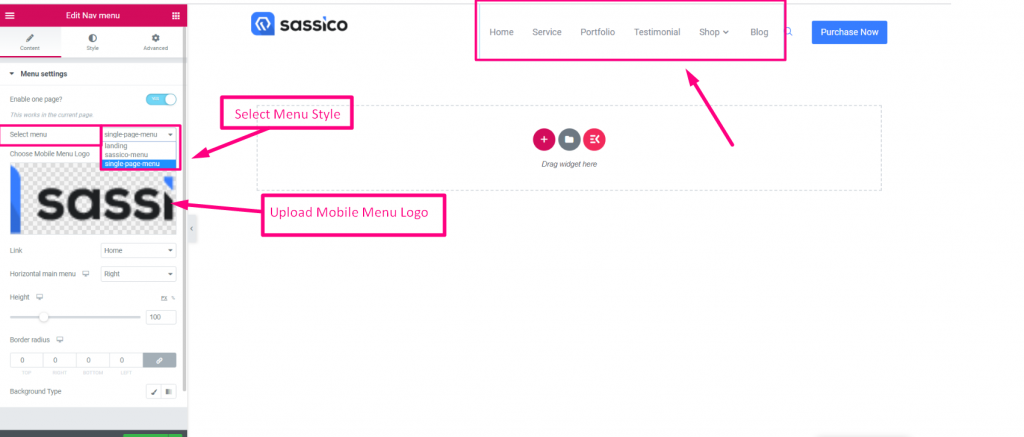
- Select Menu Style: Landing, Sassico-Menu, Single-Page-Menu
- Upload Mobile Menu Logo
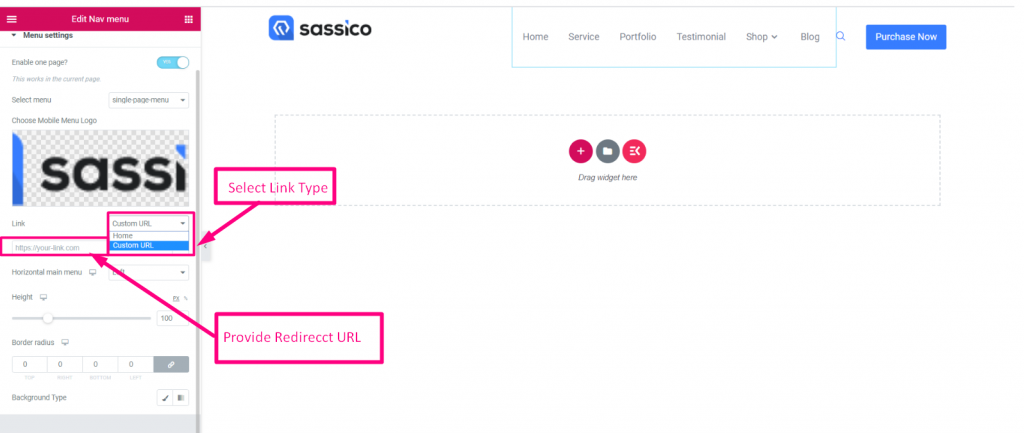
- Select Link Type: Home or Custom Link
- Provide Redirect URL
- Select Position: Left, Center, Justified
- Select Height
- Border Radius
- Background Type
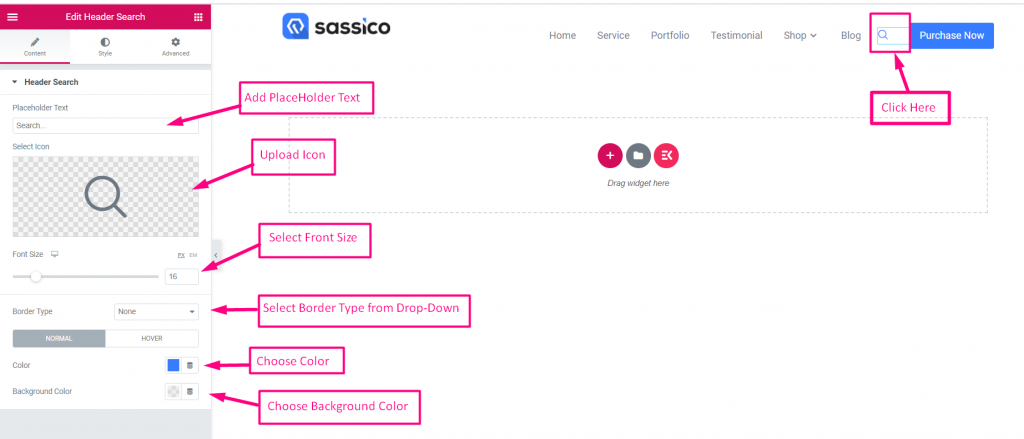
Search
- Add Place Holder Text
- Upload Icon
- Select Front Size
- Select Border Type: Solid, Doubled, Dotted, Dashed, Grooved
- Choose Color
- Choose Background Color
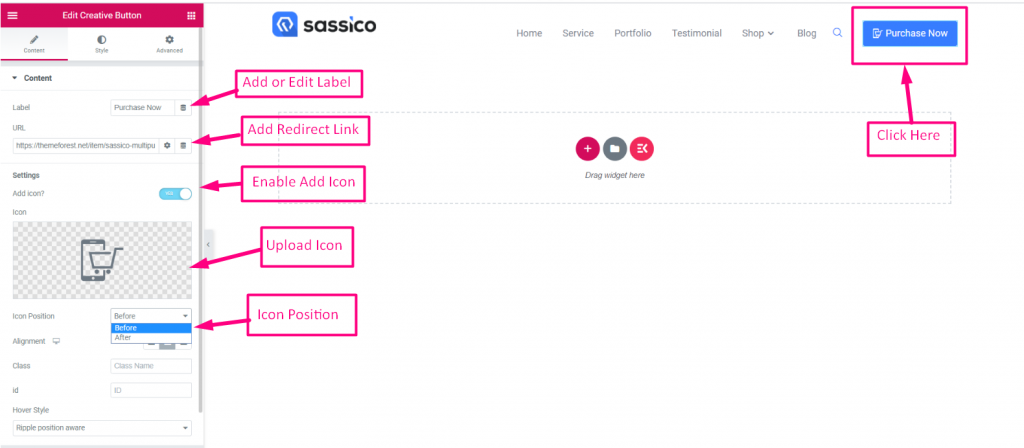
Purchase Now
- Add or Edit Label
- Add Redirect Link
- Enable Add Icon
- Upload Icon
- Icon Position
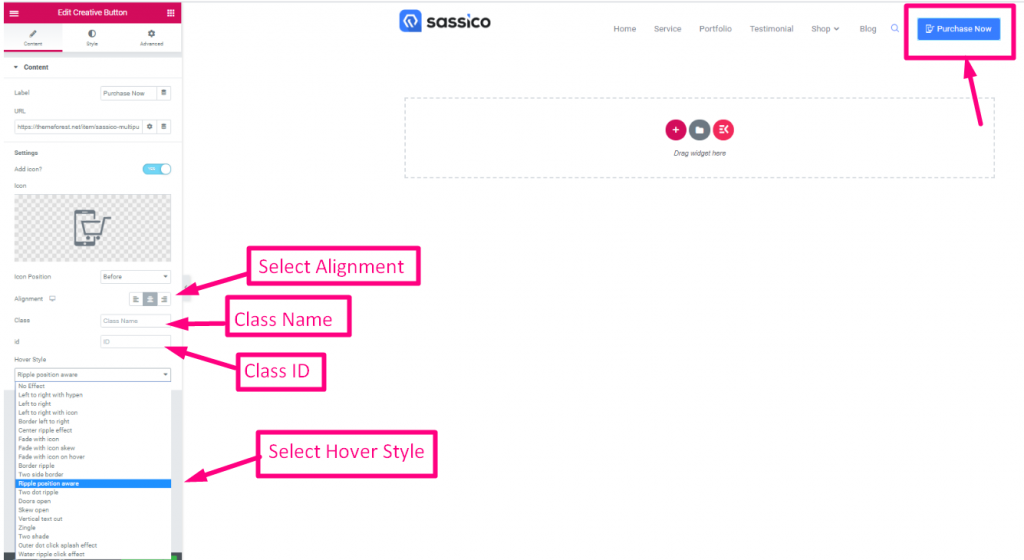
- Select Alignment
- Class Name
- Class ID
- Select Hover Style from the Drop-Down
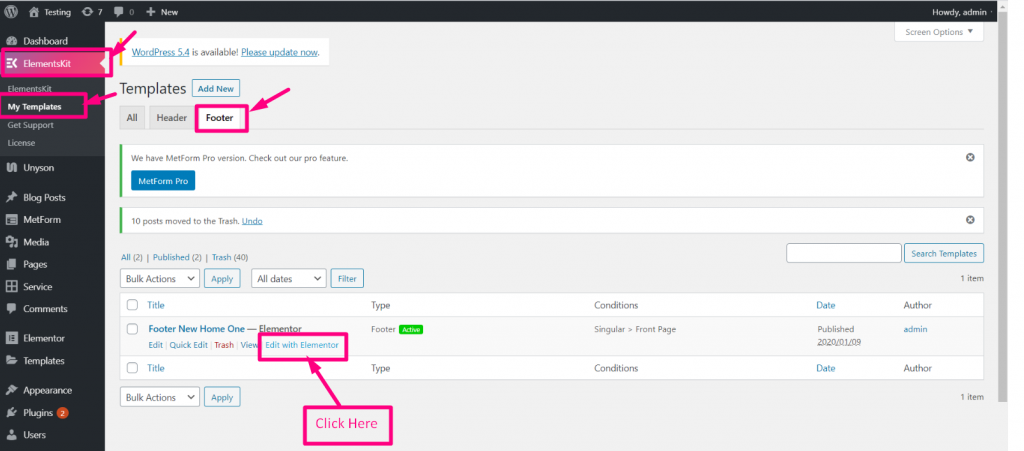
Footer
Now Go to Footer=> Click on Edit with Elementor
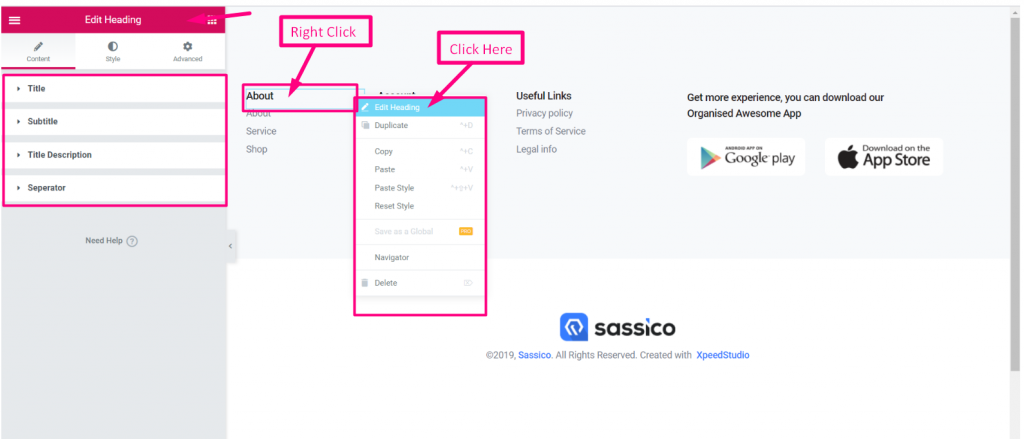
Heading
Right Click on the Heading=> Edit Heading=> Check Out our Heading Documentation for Details: https://help.wpmet.com/docs/widget-documentation/
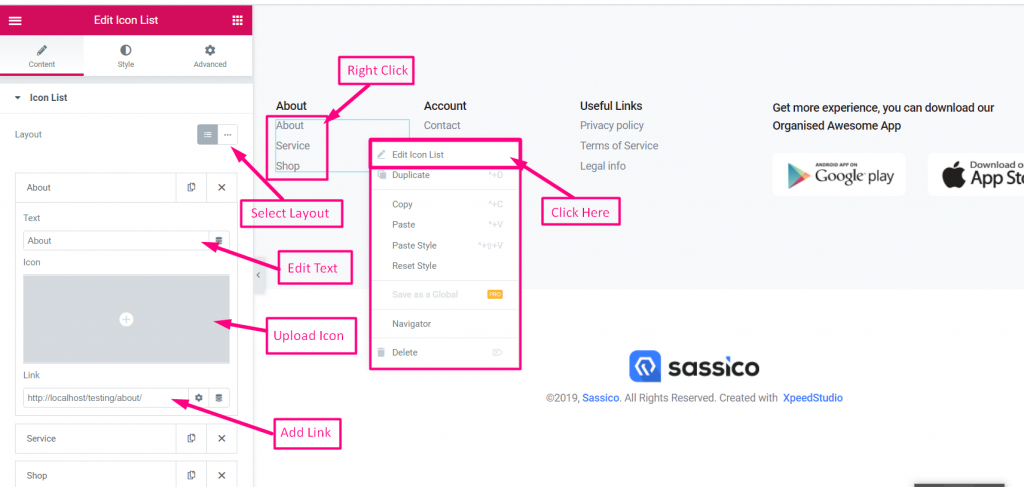
Icon List
Right Click on the Icon List=> Edit Icon List
- Select Layout
- Edit Text
- Upload Icon
- Add Redirect Link
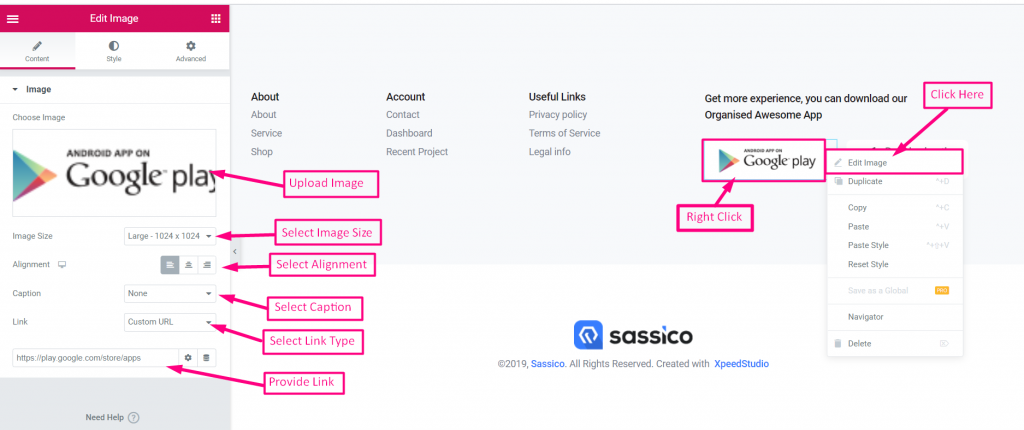
Footer Logo Image
Right Click on the Image=> Edit Image
- Upload Image
- Select Image Size
- Select Alignment
- Select Caption: None, Attachment Caption or Custom Caption
- Select Link Type: None, Media File, Custom URL
- Provide Redirect URL